Step 2 - Set Fields
This step allows you to select the Column Headers from the imported data table to be used as Fields (or parameters) for data filtration and categorization. To do so, you need to associate the column headers with the standard categories (Isolate ID, Organism Group, Organism Name, and Date) required by AMRcloud. You can also select additional columns with spatial data, other metadata and markers to be used as Fields.
The required categories (with brief accompanying instructions) are listed on the left side of the screen. On the right side of the screen, you should choose the corresponding column headers from the drop-down lists. As you proceed with selection, you will be able to preview the content of the first ten rows of each selected column.
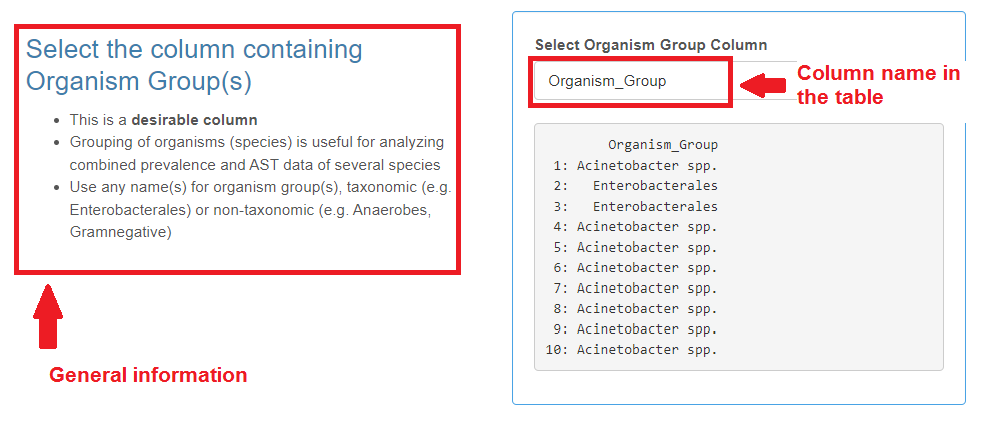
Isolate ID
- This is a mandatory category.
- Isolate ID can be any combination of alphanumeric characters, except special symbols (?,.!%$#><).
Organism Group
- This is a desirable category.
- You can use any names for organism groups, full taxonomic (e.g. “Staphylococcus”), non-taxonomic (e.g. “Staphylococci”) or abbreviated (e.g. “Staph”), however, the names should be consistent throughout the column.
- Grouping of organisms (species) is useful for analyzing combined prevalence and AST data of several species.
Organism/Species Name
- This is a mandatory category.
- Use Latin binomial names according to official nomenclature (https://lpsn.dsmz.de/).
- Proper genus and species names are automatically recognized to apply specific breakpoints and to determine susceptibility categories.
Right:
Klebsiella pneumoniae, Acinetobacter baumannii, Pseudomonas aeruginosa (full binomial names)
Wrong:
K. pneumoniae, A. baumannii, P. aeruginosa (abbreviated names)
Select the Species name column from the drop-down list, and press the “Check Species Names” button to verify the names.
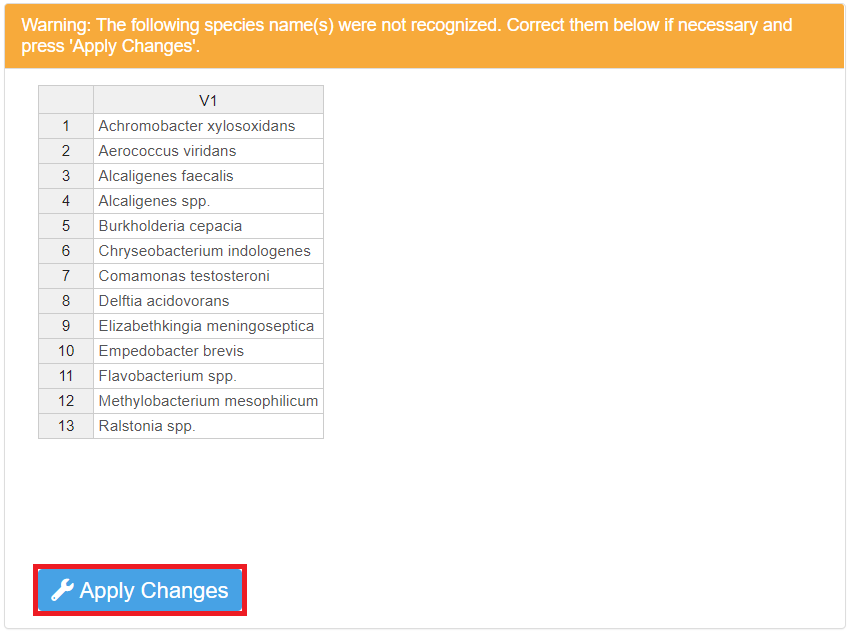
A list of species names that are not recognized may appear below the button. There may be two reasons for the name(s) to fail the verification process:
-
There are spelling errors (e.g. missing, incorrect letters, etc.). Spell-check the name(s) carefully, correct the error(s) by double-clicking and editing the name(s) directly in the list, then press the “Correct species names” button.
-
The outdated or invalid species name is used. Try searching the name at https://lpsn.dsmz.de/ or https://www.ncbi.nlm.nih.gov/taxonomy/ and replace it with the correct one.
Example #1. “Enterobacter aerogenes” is the old name for “Klebsiella aerogenes".
- Interpretive criteria (S/I/R breakpoints) are missing for a particular organism/species in the AMRcloud database. In this case, no correction is needed; species name will be imported “as is”.
Example #2. The species name “Shewanella putrefaciens” is correct but is not recognized because breakpoints are currently missing for this species.
If the full species name is not recognized, the data import wizard will attempt to determine the genus part of the name and, where possible, will apply the corresponding genus-specific breakpoints to the isolates’ quantitative AST data. If neither a species nor a genus name is found in the AMRcloud susceptibility breakpoint database, the corresponding isolate record(s) will be imported, but quantitative susceptibility data will not be translated to S/I/R categories.
Example #3. If “Salmonella Typhimurium” is used as species name (for “Salmonella enterica ser. Typhimurium”), the genus-specific breakpoints of Salmonella will be applied.
Date
- This is a mandatory category.
- The date format must be consistent throughout the column.
- Records without a date or with a different date format will not be imported.
Right:
12.08.2018, 20.05.2017, 16.03.2014 (same format DD.MM.YYYY)
Wrong:
13.08.2018, 20/05/19, 03/16/2014 (inconsistent format DD.MM.YYYY, DD/MM/YYYY, MM/DD/YYYY)
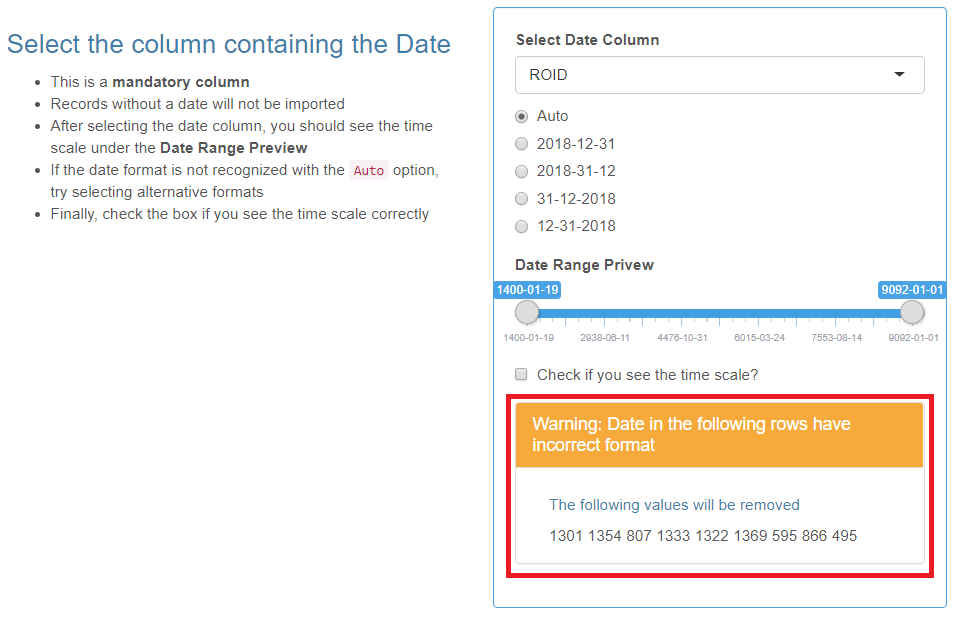
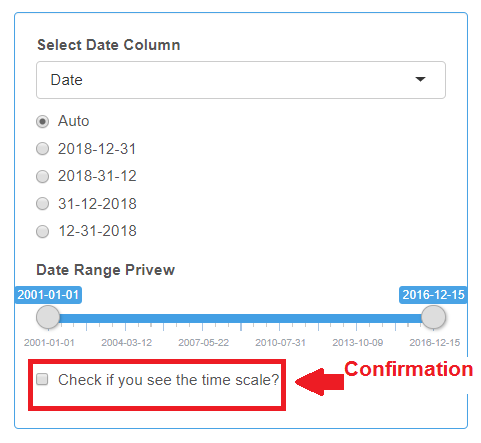
After selecting the Date column from the drop-down list, you should see the time scale under the “Date Range Preview”. If the date format is not recognized with the Auto option, try selecting alternative date formats. Be sure to check the box when you see the time scale.
Spatial Information
- This is not a mandatory category.
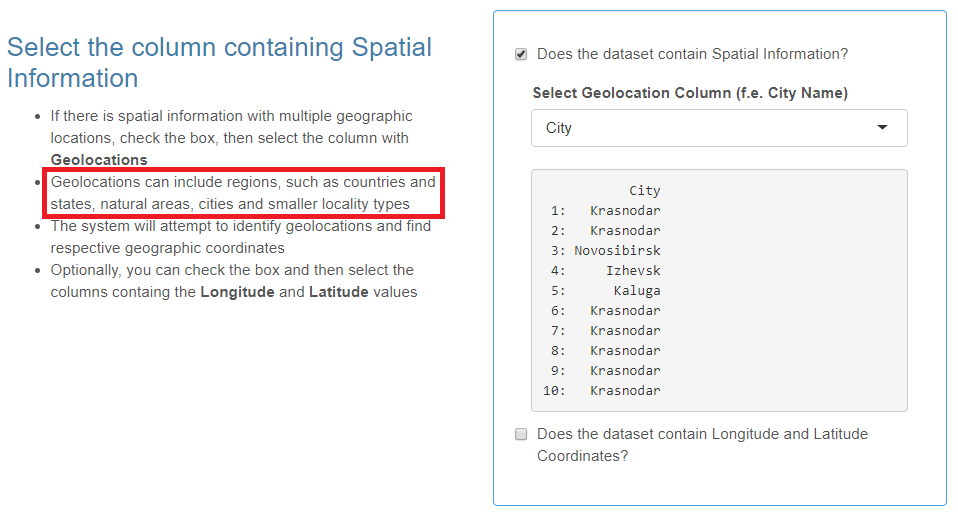
- Spatial information includes geographic locations and, optionally, their latitude/longitude coordinates.
- You may provide various types of objects as geolocations: countries, regions, states, natural areas, cities, smaller locality types or even detailed addresses (e.g. hospital buildings).
Check the box if your data set contains spatial information and select the header of the column with geographic locations from the drop-down list.
The coordinates of geolocations can be set automatically or manually at Step Three of the data import wizard. However, if your data table already contains the two columns with latitude and longitude coordinates, check the corresponding box and then select these columns.
Numeric Parameter
- This is not a mandatory category.
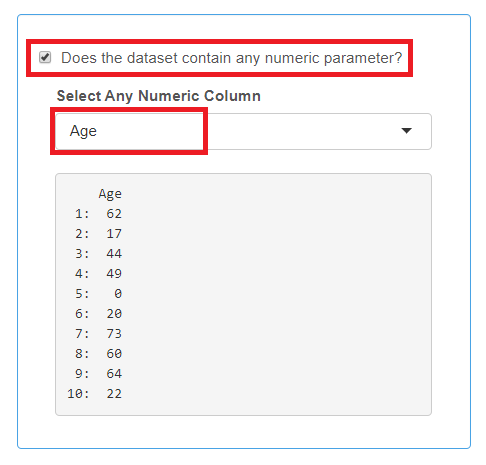
- Only one column containing continuous numeric variable such as “age”, “weight”, etc. can be selected.
- If you use a numeric parameter, all cells in the column must be filled in with the number, isolate records (rows) with empty numeric fields are not imported.
Check the box if your data set contains a numeric parameter and select the corresponding column header from the drop-down list.
Markers
- This is not a mandatory category.
- Markers may represent any isolate characteristics (phenotypes, complex genotypes, genes or mutations) that are relevant to antibiotic resistance.
- Markers can be assigned to groups with each group of Markers set in a separate column.
- The total number of columns of this type is unlimited.
Check the box if your data set contains resistance markers data and select the corresponding column header(s) from the drop-down list.

Additional Parameters
- This is not a mandatory category.
- A maximum of twelve columns with text variables (including the one with geolocations) can be selected as parameters for data filtration and categorization.
Select the corresponding column headers from the drop-down list, drag and sort them with the mouse in the desired order.

Completing Step Two
Review all the selections made at this step and complete it by pressing the “Validate Step Two” button.

You can reset any saved step and all subsequent steps of the data import wizard by pressing the Reset current and all following steps button.
Tip: There is no need to reset all steps if you only want to apply different interpretive criteria (susceptibility breakpoints) to the existing data set; this can be done by resetting only the Step Four.