Step 3 - Geocode
Geocoding is the process of transforming a description of a location to a location on the Earth’s surface. At this step, the data import wizard processes the names of the geographic objects (geolocations) and assigns them latitude and longitude coordinates. In this way, the geolocations’ related statistics can be shown on the interactive maps in AMRcloud.
Automatic Geocoding
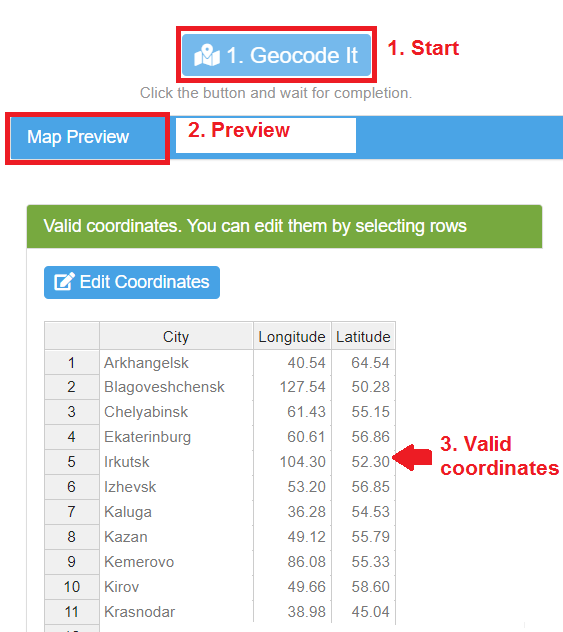
Press the “1. Geocode it” button to start the geocoding process. Please be patient, as it may take some time depending on the number and type of locations. When coordinates appear in the table on the right side of the screen under the “Valid coordinates…" green panel, open the map preview by left-mouse clicking on the header of the “Map: preview” blue panel.
You can zoom and pan the map to check the positions of the markers. Inspect all the marker positions carefully, as the automatic geocoding may sometimes fail to identify or misidentify the geolocations (for example, it may confuse the names of St. Petersburg, Russia, and St. Petersburg, Florida, USA).
When you make sure all coordinates are assigned correctly, complete the step by pressing the “Validate Step Three” button. Alternatively, proceed to the following instructions for assigning the coordinates manually.
Setting the Coordinates Manually
If any coordinates are not found or found incorrectly, check the spelling of the names of geolocations with missing/wrong coordinates. If there are errors, correct them in the source data table, reset all import steps from Step One, re-upload the data table and repeat all steps including the Geocoding.
If the names of geolocations with missing/wrong coordinates are correct, you can assign the coordinates manually.
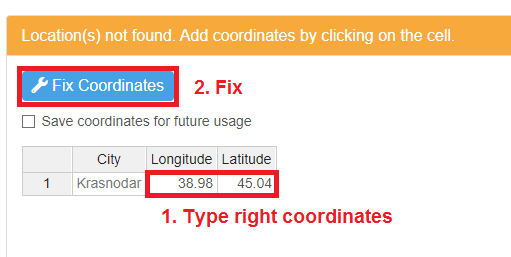
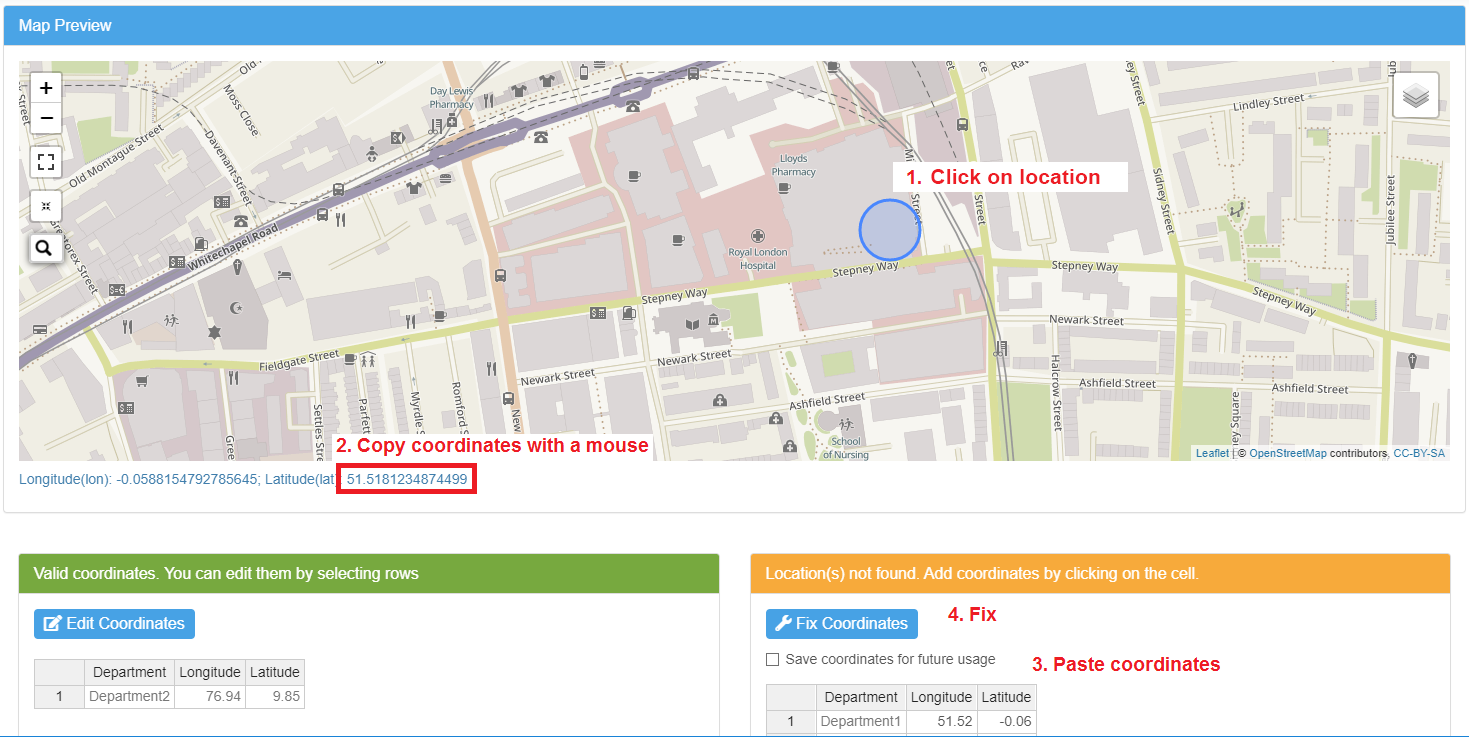
To add missing coordinates, left-mouse double-click on the required cells of the right side table under the “Location(s) not found” orange panel, enter the Latitude and Longitude values, and then press the “Fix Coordinates” button.
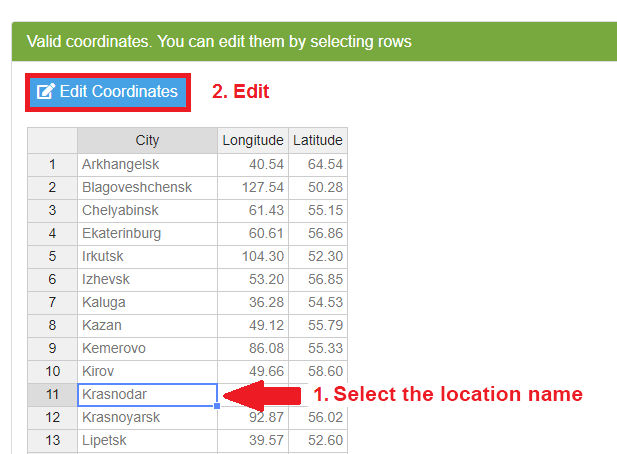
To correct wrong coordinates, select the correspoding row (name of geolocation) from the left side table under the green panel with the mouse and press the “Edit coordinates” button above the table. The selected row will be moved to the right side table under the orange panel. Left-mouse double-click on the required cells, enter the new coordinates and press the “Fix Coordinates” button.
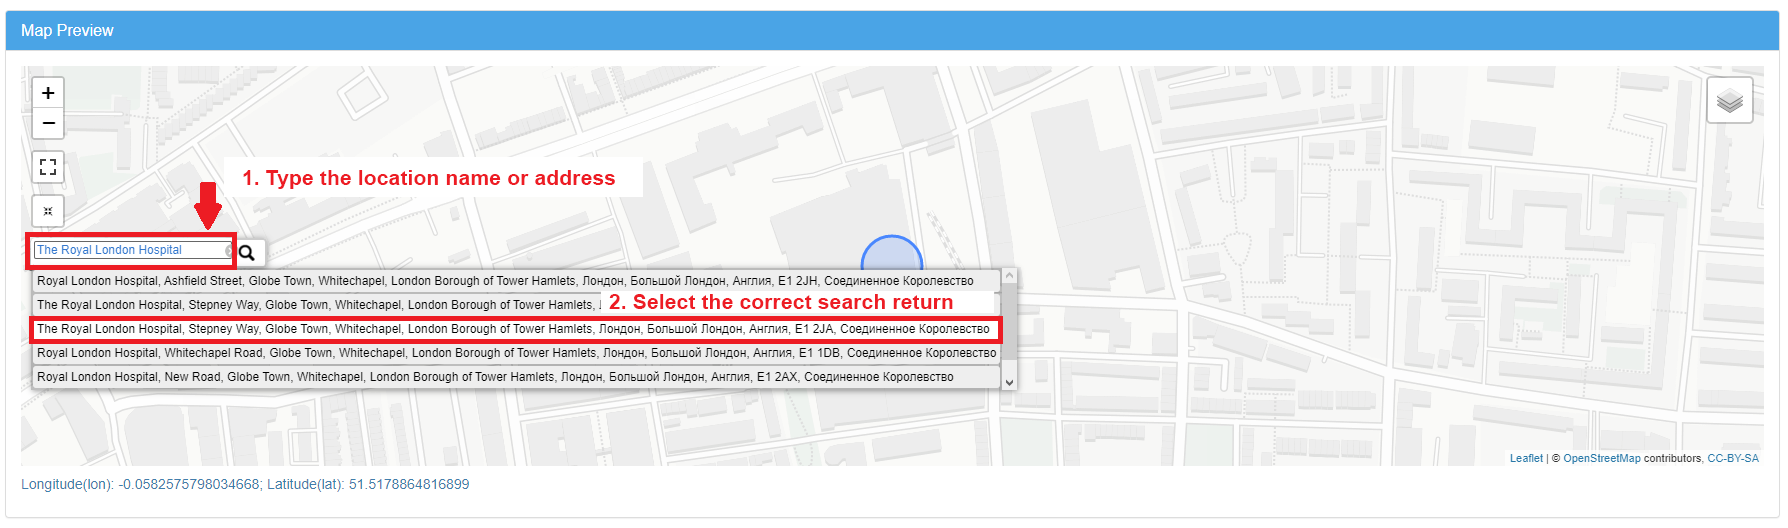
How to Get the Latitude/Longitude Coordinates from the Map
You can use the Preview Map to find the location (object) of interest and to determine its coordinates.
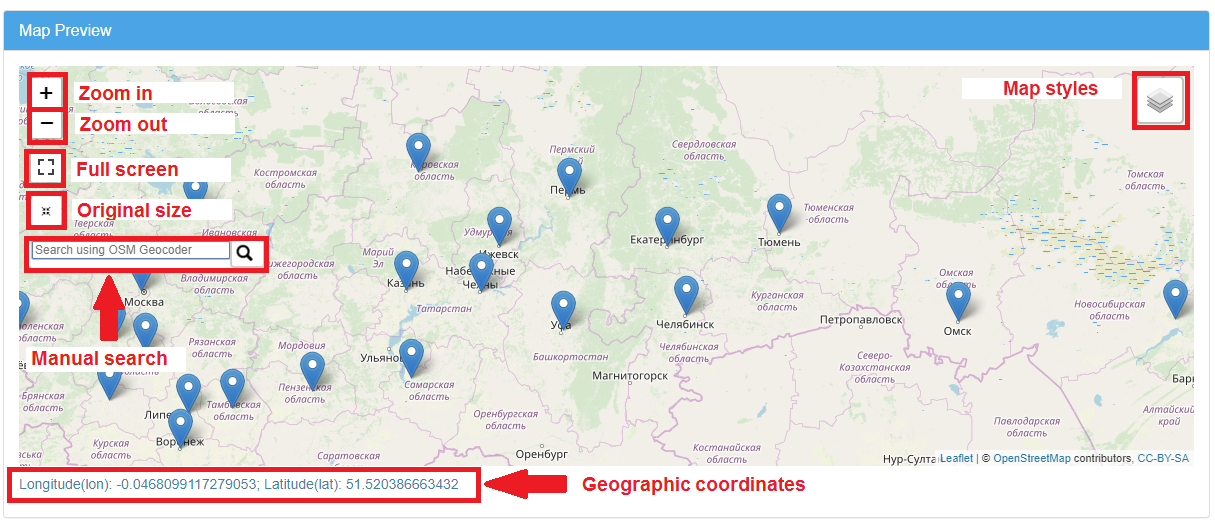
Zoom and pan the map to find the location of interest.
Left-mouse click on the desired location on the map. The location’s Latitude and Longitude will be displayed below the map. Copy and paste these values into the corresponding сells of the right side table under the orange panel. When done, remember to press the “Fix Coordinates” button.
Saving Your Geolocations for Future Usage
If you are going to process the same geolocations again (e.g. in the subsequently uploaded data sets), you can save their coordinates in your personal list (This list is accessible and can be modified in the “My Geopoints” tab of the “My Profile” menu). Select and move the names of such locations to the right side table under the orange panel, enter the coordinates as described above, check the box “Save coordinates for future usage” and press the “Fix Coordinates” button. Your stored locations will be instantly identified the next time you perform the geocoding process.