Link WHONET to AMRcloud
This tutorial shows you how to export and convert the data from WHONET program for uploading to the AMRcloud online platform.
The basic steps of uploading data to the AMRcloud online platform are described in the AMRcloud Data Import Tutorial
WHONET export
Running WHONET Program
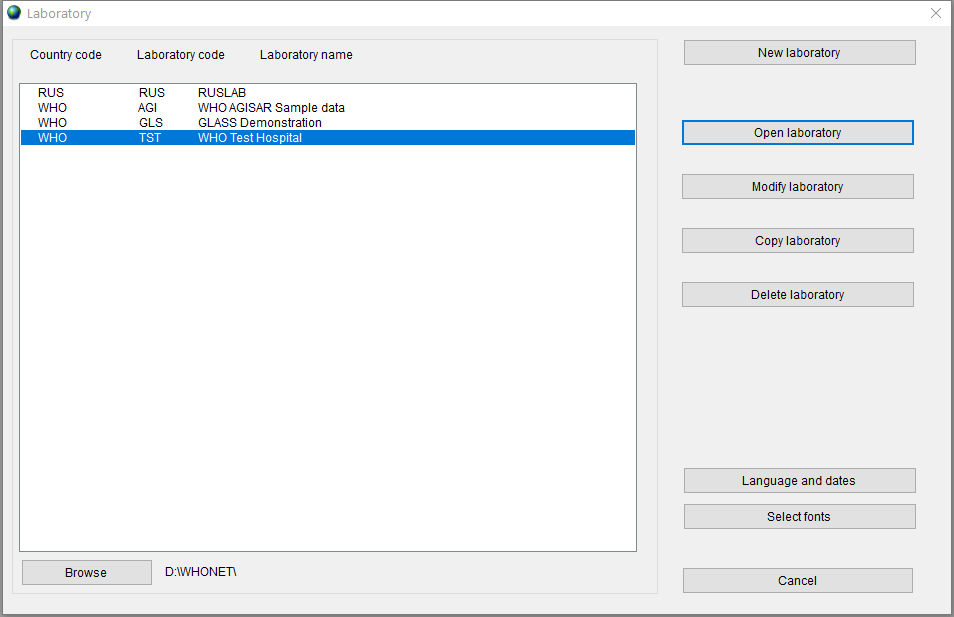
Run WHONET program and select the name of your laboratory.
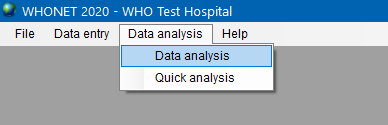
Choose ‘Data analysis’ from the ‘Data analysis’ menu.
Analysis Type
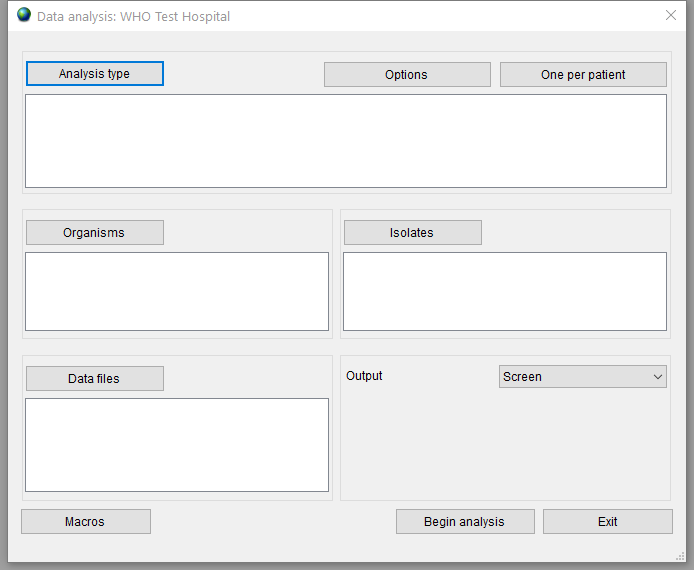
In the opened window, press the ‘Analysis type’ button.
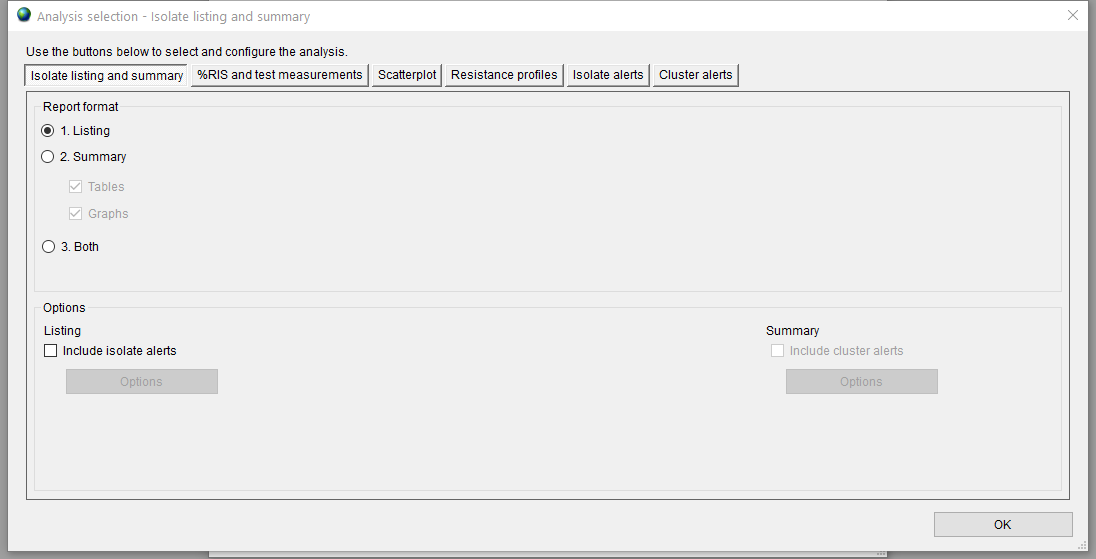
In the ‘Isolate listing and summary’ tab, select ‘Listing’ for report format and press the ‘OK’ button.
Analysis Options
Press the ‘Options’ button to set additional options for data export and conversion. This step is is not mandatory but may be be useful in certain scenarios. For example, you can choose to ‘Combine Disk, MIC, and Etest results’ in the ‘Test interpretations’ panel; or remove patients’ personal data by selecting the ‘Encrypt patient information’ checkbox in the ‘Isolate listing and summary’ panel.
The default state of the ‘Analysis options’ window is shown in Figure 5.
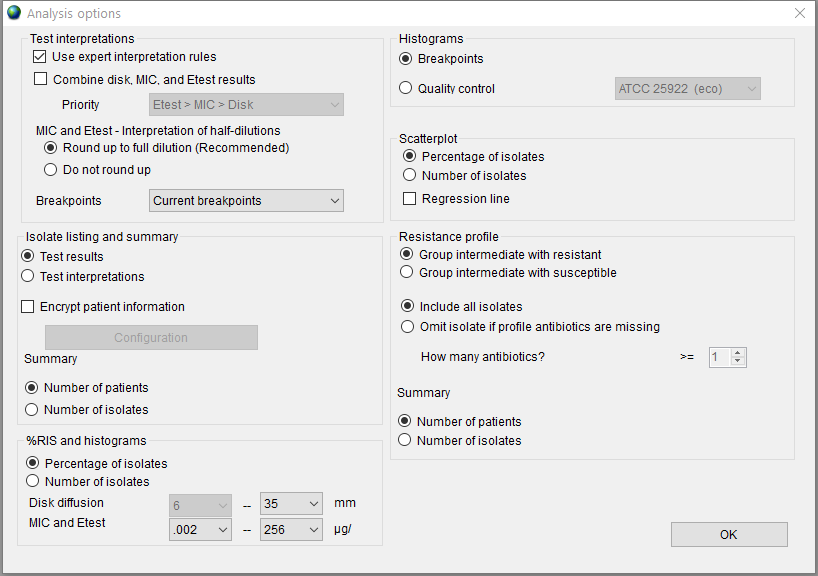
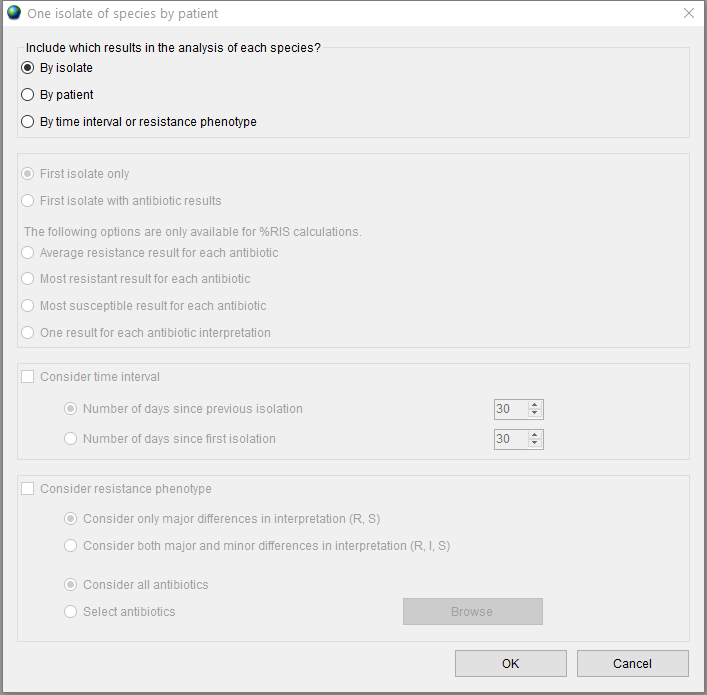
You can choose whether to include in the report all isolates or one isolate per species by patient. The ‘By isolate’ mode is used by default. Check the ‘One per patient’ radio button to change it.
Organisms
Press the ‘Organisms’ button to select the organisms you would like to include in analysis. This step is mandatory.
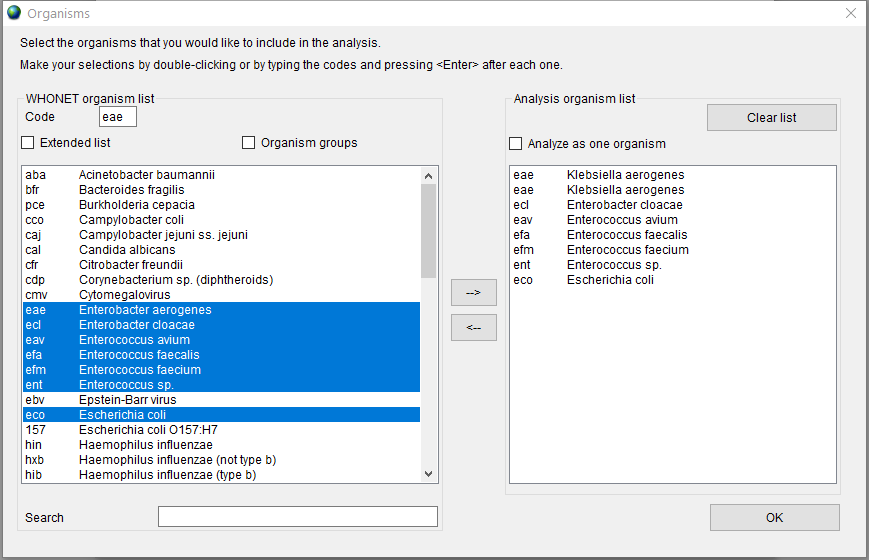
From the left-side list, select the organisms to be included in the report by clicking on them. Use Ctrl or Shift keys to select multiple entries. Press the '–>’ button to add selection to the right-side list; press the ‘<–' button to remove selected organisms.
Isolates
You can define additional criteria for selecting the isolates to be included in the report by clicking the ‘Isolates’ button.
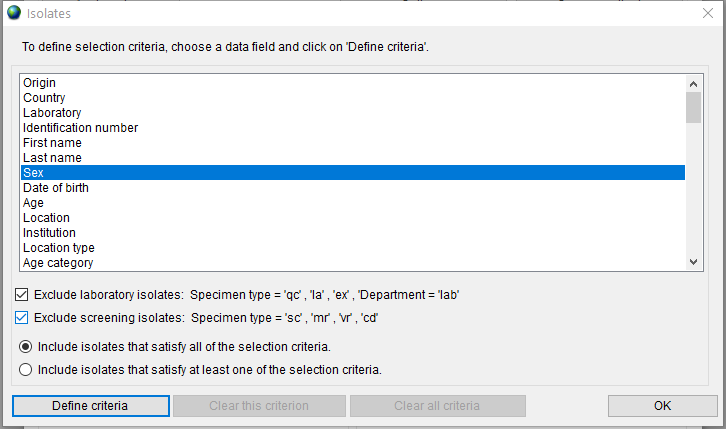
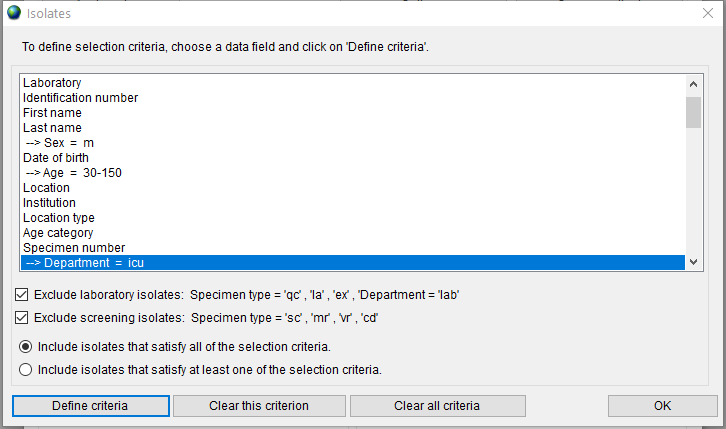
Choose a data field and click on the ‘Define criteria’ button. For example, to select the isolates collected in ICU from male patients over 30 years old, you need to set three selection criteria as follows:
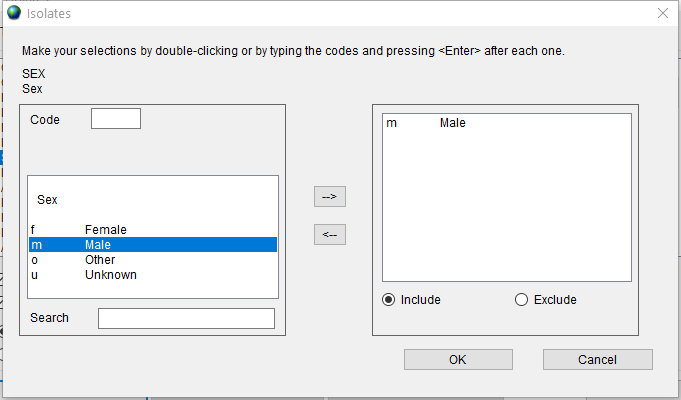
First, double click on the ‘Sex’ item in the list to open the dialog, double click on ‘m - Male’ and press the ‘OK’ button.
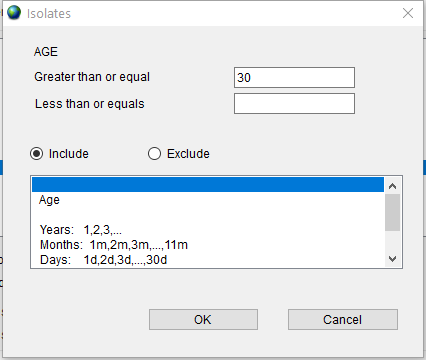
Second, double click on the ‘Age’ item in the list to open the dialog, type ‘30’ in the ‘Greater than or equal’ field and press the ‘OK’ button.
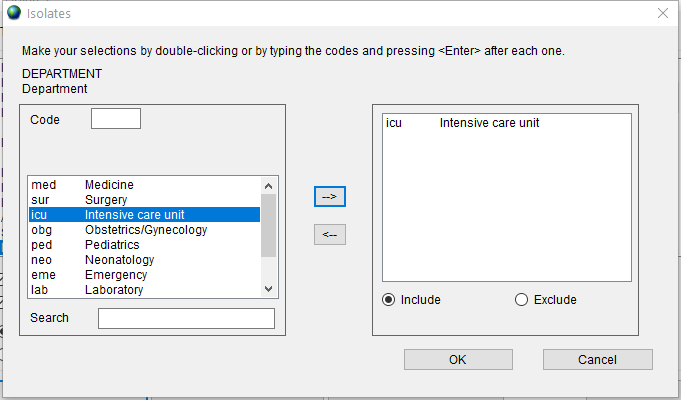
Finally, double click on the ‘Department’ item in the list to open the dialog, double click on ‘icu - Intensive care unit’ and press the ‘OK’ button.
Choose the ‘Include isolates that satisfy all of the selection criteria’ radio button to apply all three selected criteria together. The ‘Isolates’ window with selected criteria is shown in Figure 12.
Data Files
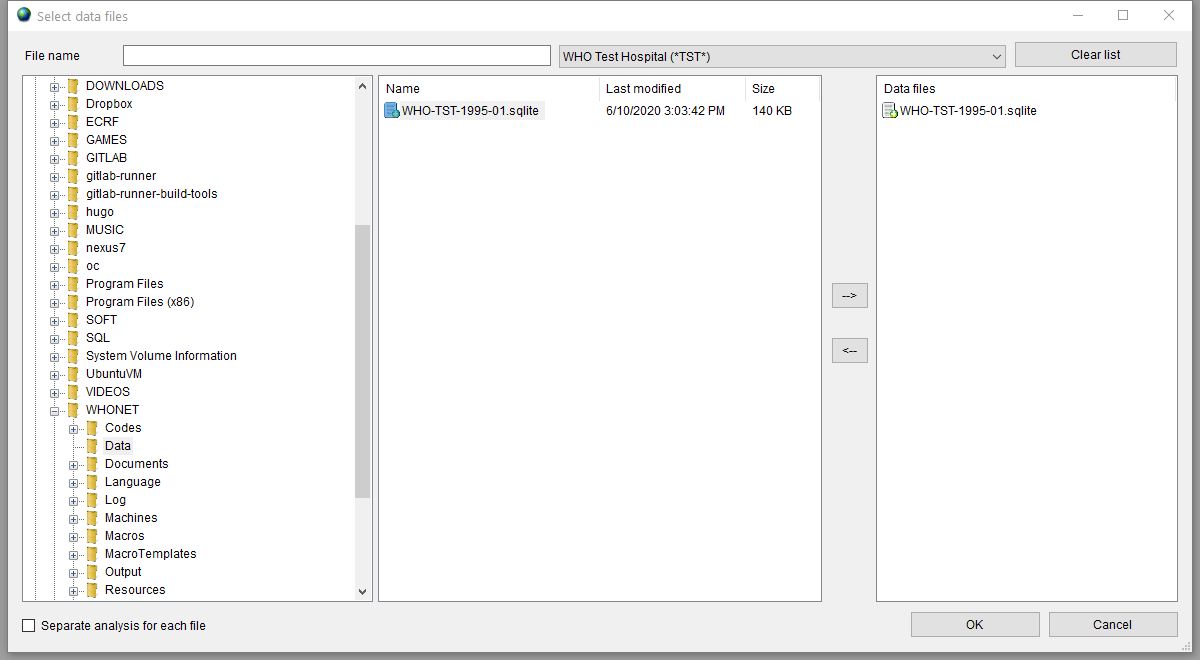
After setting the options, you should specify the WHONET data file to analize. Press the ‘Data files’ button and select your laboratory data file.
Preview
The ‘Data analysis’ window with selected options is shown in Figure 13.
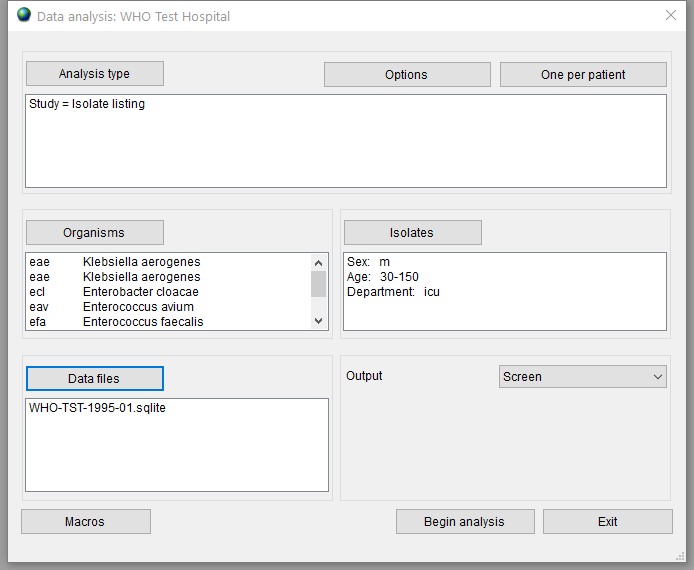
To preview the output, select the ‘Screen’ option in the ‘Output’ list and press the ‘Begin analysis’ button.
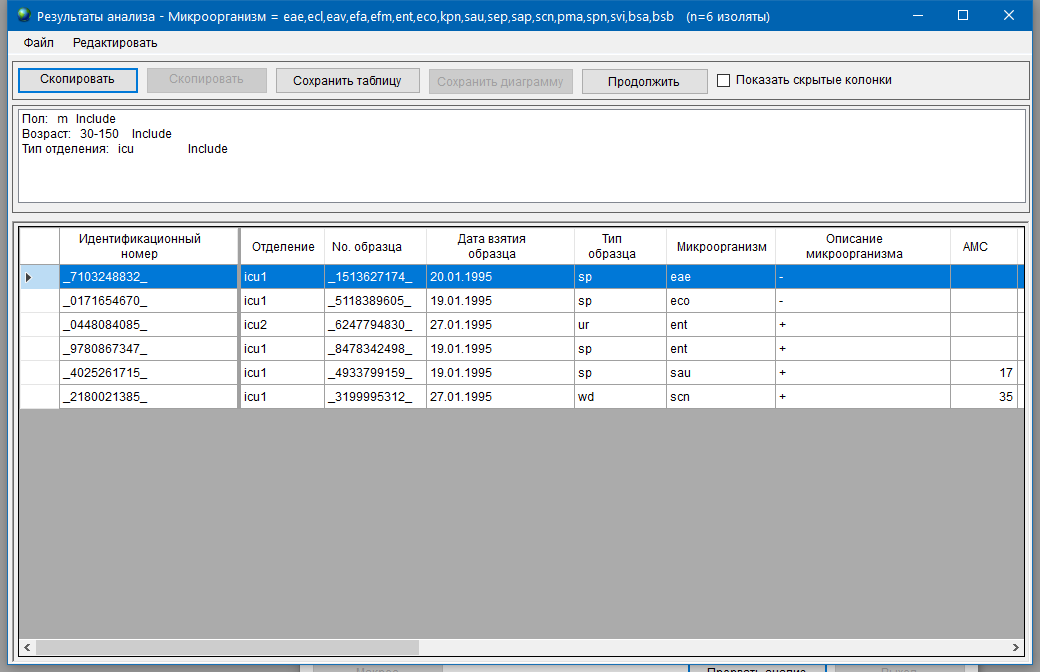
If the resulting list of isolates differs from what your expect, adjust the options as needed and repeat the procedure.
Export
To export the list of isolates to a file, select the ‘Text (WHONET)' option in the ‘Output’ list, enter a path for saving a file as shown in example in Figure 16.

Press the ‘Begin analysis’ button to create a text export file. This file can be converted into AMRcloud readable format as described in the next chapter.
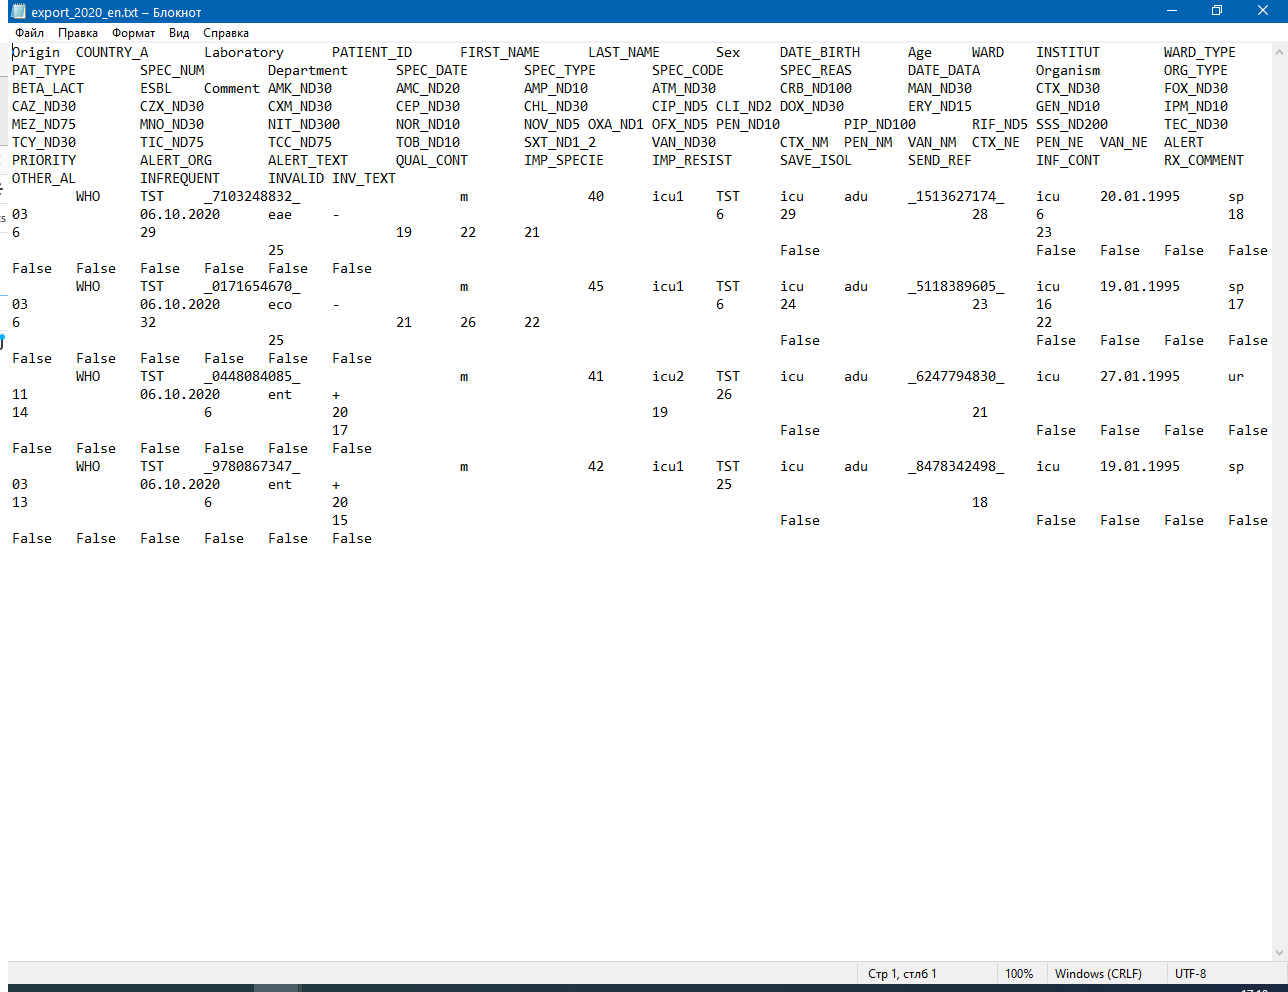
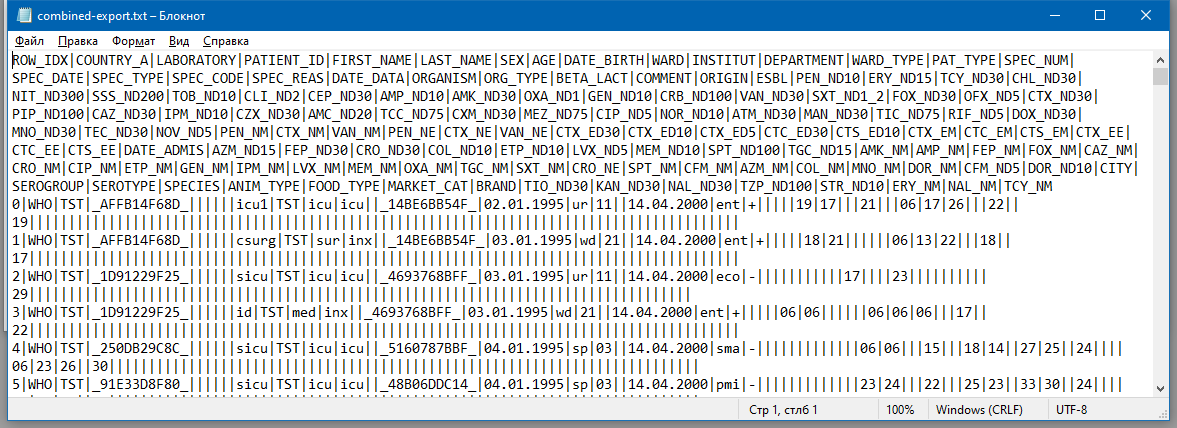
An example of WHONET export file is shown in Figure 17.
Save export settings
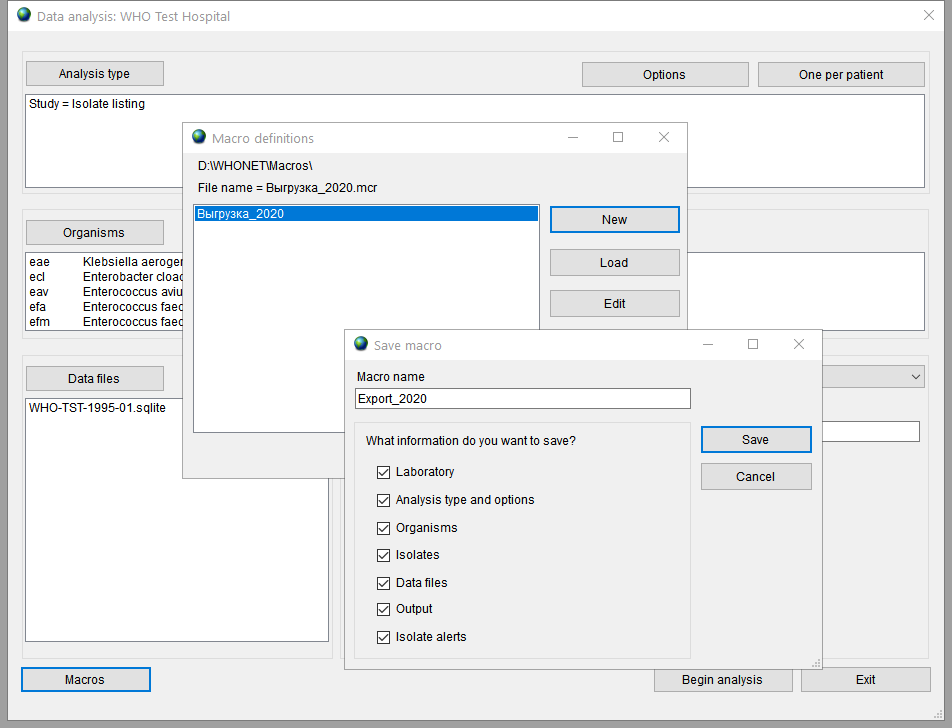
Usually, export procedure has to be repeated at regular intervals. To save your time and not to set the same values in filters every time, you can save export settings and parameters to special file called macro. To show the Macro definitions window press the Macros button in the Analysis data window. Here you can see list of previosly saved macros. To add new macro press the New button, type the macro name, check settings you want to save and press the Save button.
Чтобы воспользоваться сохраненным макросом, откройте окно Анализ данных, нажмите кнопку Макрос, выберите сохраненный макрос и нажмите кнопку Нагрузка/Load.
To use saved macro open the Analysis data window, press the button Macros, choose necessary macro and press the Load button.
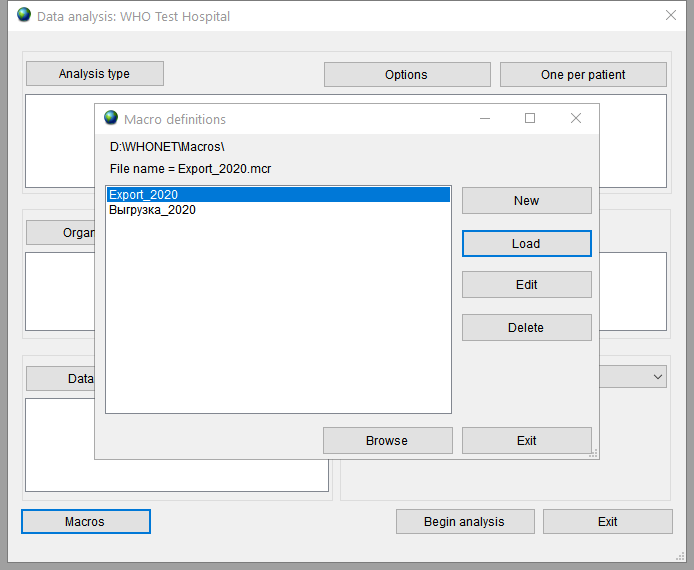
The filter values will be filled in automatically and after that you can press the Begin analysis button.
Combine and Export multiple files
In some cases, it may be necessary to export multiple data files. For example, laboratories can store their data in different files, or files from one laboratory can be separated by years.
WHONET allows you to combine data from these files and export them as one file.
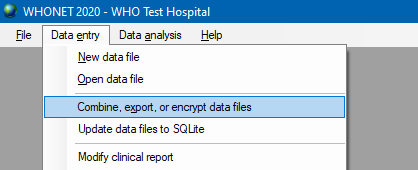
Choose Combine, export, or encrypt data files from Data entry menu.
In the opened window, press the Data files button and select files you need to combine. In the Save as type list select WHONET for report format. Enter a path for saving export file. It is recommended to select the .txt format for further processing or converting. If the data contains personal information, it will be useful to check the box Encrypt patient information.
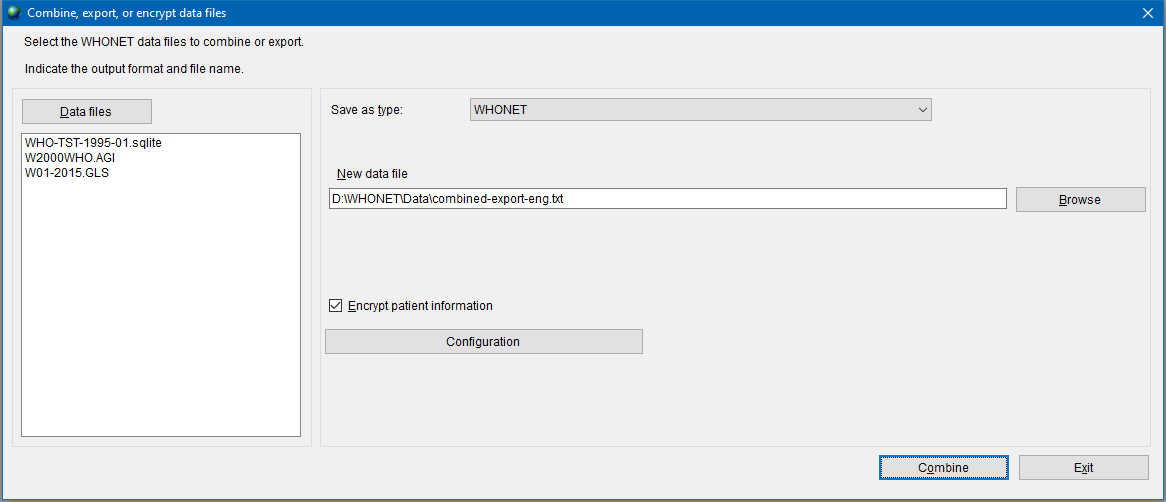
Press the Combine button to create a text export file. This file can be converted into AMRcloud readable format as described in the next chapter.
This window can also be used to export a single file — this method may be easier and more convenient if no additional conditions for filtering isolates are required.
AMRcloud convert
The conversion of WHONET output file is needed in order to bring it to AMRcloud readable format. To convert the file use the following link: https://public.amrcloud.net/whonet.
Uploading a File
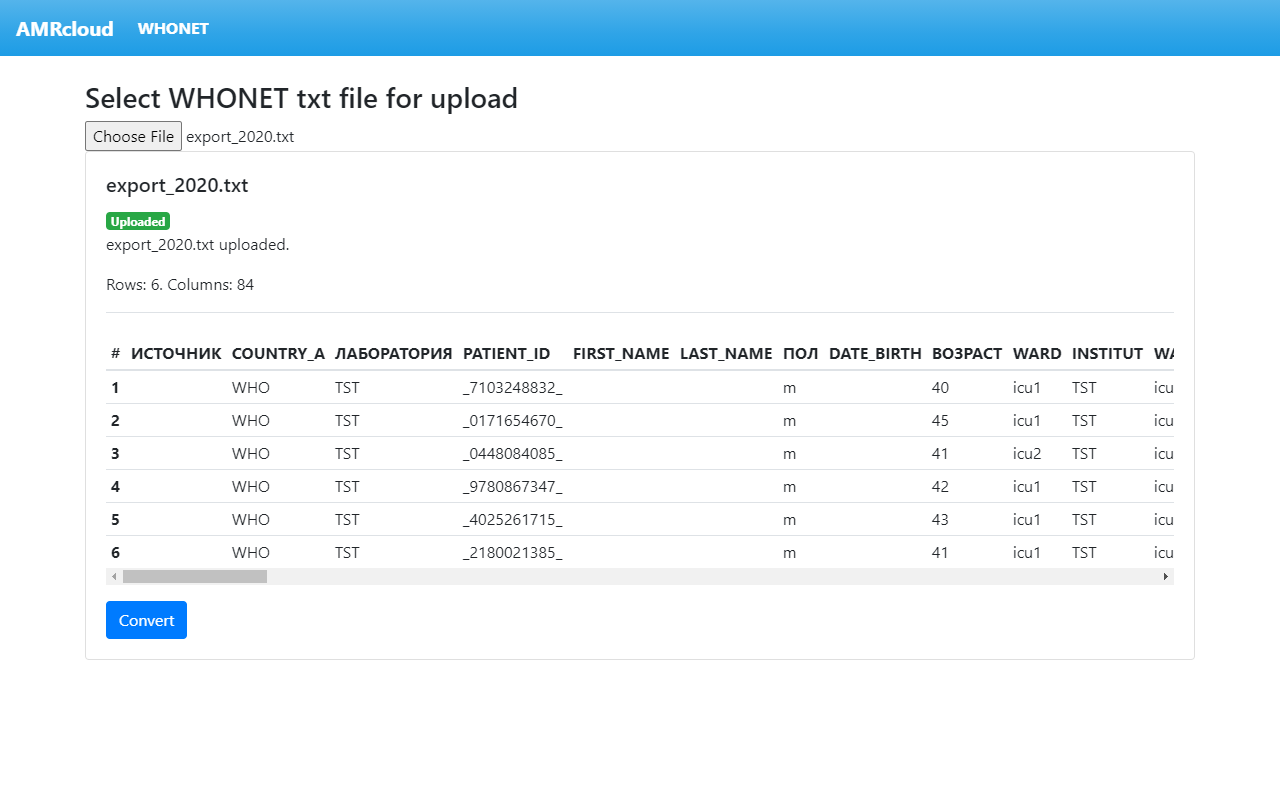
Press the ‘Choose file’ button and select the WHONET export file from previous step.

The upload will start automatically. When the upload is complete, the converter checks the file content and previews it on screen.
The export file must meet the following requirements:
- Maximum size: 10 MB;
- Column separator: Tab;
- All column names must be unique.
If the upload is successful, you will see the following:
If you see an error message, further file processing is not possible. In an example shown below, an error message is caused by the presence of duplicate column named ‘FOX_ND30’.
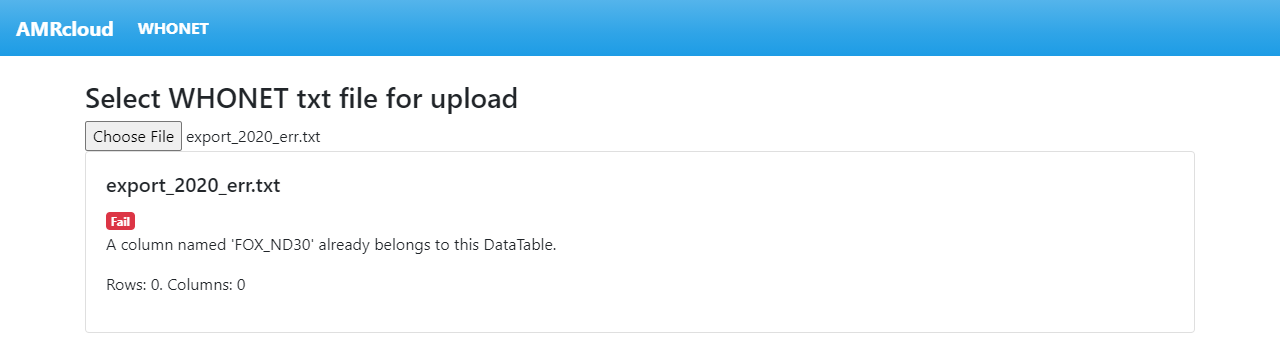
Correct any errors and re-upload the file.
Converting a File
To convert the uploaded file press the ‘Convert’ button.
During a conversion process, the WHONET abbreviated codes for antibiotics, microorganisms, and clinical materials are being replaced by the corresponding full names and ‘suffix codes’ that can be read by the AMRcloud. In addition, the column named ‘ORGANISM_GROUP’ is automatically added and filled in. This column is mandatory for the AMRcloud that uses a two-level hierarchy of organisms to allow reporting the combined susceptibilities for any organism group. Once the conversion is complete, a report is displayed, as shown in example in Figure 4.
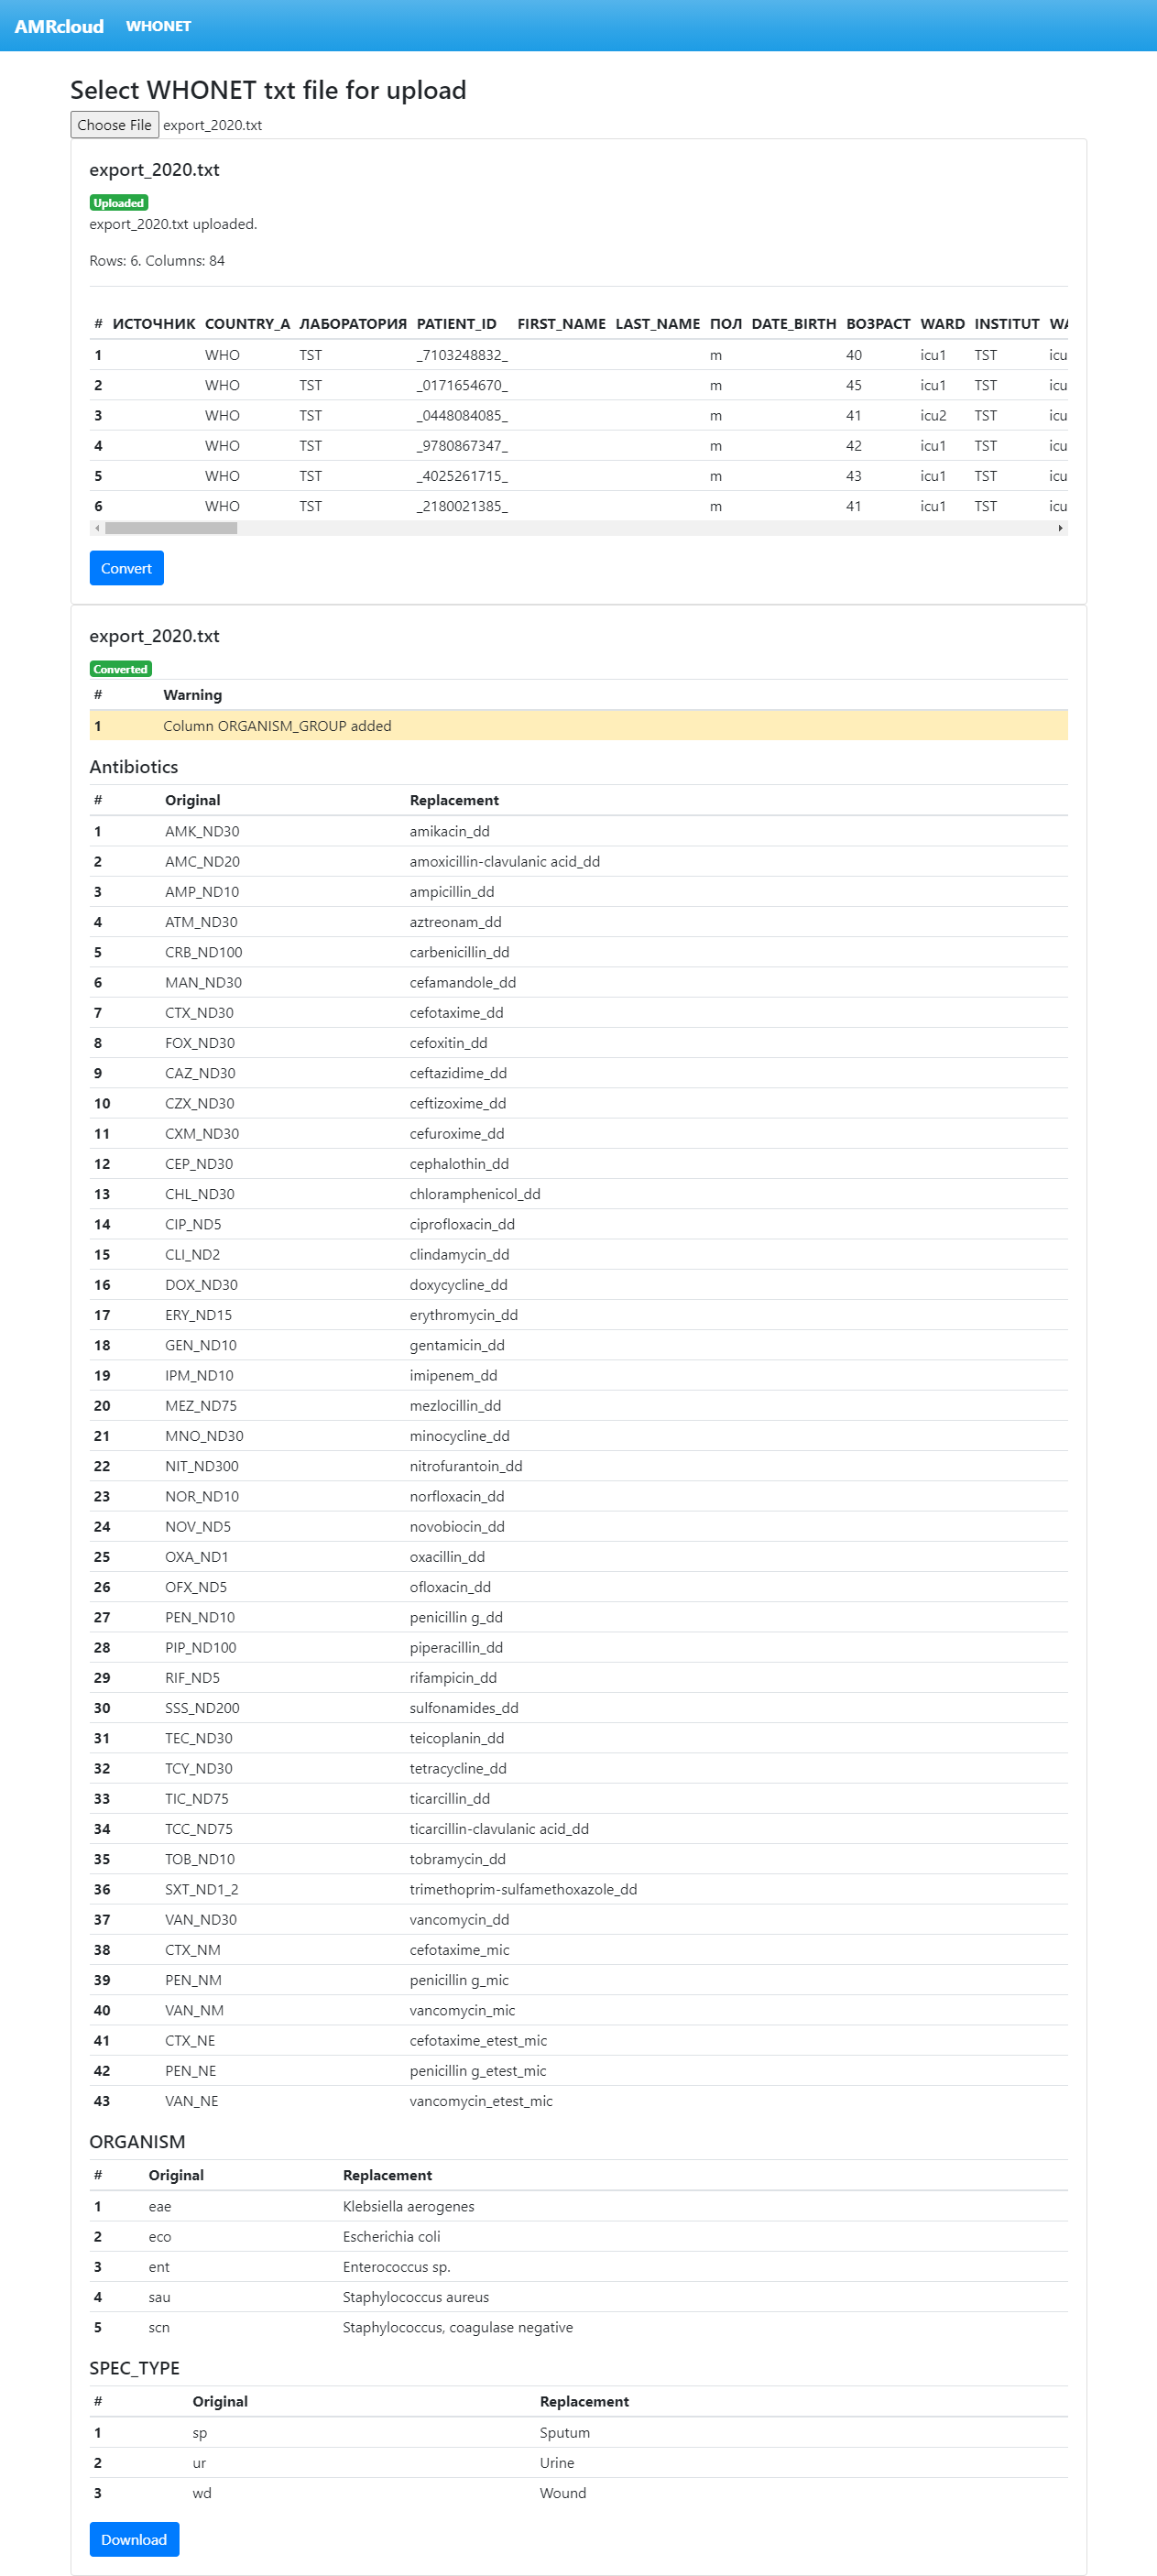
On the top of the report, there are warnings from the conversion process that provide important information you should pay attention to. In the example above, the only warning message informs that the ‘ORGANISM_GROUP’ column has been created. This is a standard warning that does not require any action, however, you may wish to change the organism groups manually at your discretion. Other warning messages you may see are explained below.
| Warning message | Explanation |
|---|---|
| Columns with identical names have been enumerated | This message is displayed when two or more columns are translated with identical antibiotic names and suffixes. In the example shown below, the WHONET file contained two columns ‘AMK_ND30’ and ‘AMK_ND20’ that should have received the same name ‘amikacin_dd’ upon convesion. To avoid duplication of column names, a number has been added to the name of the second column: ‘amikacin_1_dd’. |
| No translation has been found for… | This message is displayed when a name is not found in the translation table. In such case, the original name is preserved. If necessary, change the name(s) manually as required after finishing the conversion. In the example shown below, no translation has been found for the antibiotic code ‘AMM_NE’ and the clinical material code ‘tt’. |
| The ‘ORGANISM’ column is missing | This message is displayed when the ‘ORGANISM’ column is missing in the uploaded file. This column is mandatory for the AMRcloud. |

A list of translated codes appears below the warnings. Inspect the translations and, if necessary, correct them manually.
FYI: The following algorithm is used for the translation of antibiotic column names:
- The text string preceding the underscore (_) is translated into full antibiotic name using a ‘dictionary’;
- If the column contains any ‘S’, ‘I’, or ‘R’ values, the suffix '_sir’ is appended to the end of antibiotic name;
- In other cases, the suffix following the underscore (_) is translated and appended as follows:
- ‘ND’ – '_dd’;
- ‘NE’ – '_etest_mic’;
- ‘NM’ (or any other suffix) – '_mic’;
Downloading a File
To download the converted file, press the ‘Download’ button. The file should be ready to upload to the AMRcloud without additional modifications, except when you see critical warnings described above.
The import of data files using the AMRcloud Import Wizard is described in the tutorial.